|
Title:
Size: Medium: Mixed Media Date: |
|
|
|
Research
There is an obvious cultural connection with China, but my cultural connection goes deeper than that. This sculpture is part of a series that emphasizes the difference in pre-communist China, and post-communist China.
During the rule of Chairman Mao Zedong, the Great Leap Forward was a plan to centralize production of agriculture and industry, which lead to wide-spread starvation of peasants. The original goal was to ensure enough food was being produced for the entire country, but the true amount of food being produced was inflated to meet Mao's ever growing demands. This meant food was shipped to urban areas in greater amounts than the rural areas, and food was even being exported out of the country. The industrial aspects of the Great Leap Forward was directly related to steel production. People were required to have running backyard steel forges, and after the local supplies of wood and coal ran out, people would smelt down their cooking pots using their doors and furniture to fuel the fires. Mao, who eventually learned making steel was impossible in a backyard furnace, refused to tell the people this, instead letting them continue without enforced quotas for these communes.This attempt to move from socialism to communism in as short a time as possible lead to an estimated 14-40 million people dead from starvation between 1958-1960.
By relocating efforts to industrial productions, less agricultural goods were produced, and more and more people moved into urban environments. This is in no means an issue specific to China. This issue is seen worldwide, but the effects of communism on China is a common topic in world history classes, which is where I got my ideas from.
Planning
|
My mixed media piece utilizes hardware found in my families basements, and some random twine and plastic from my grandmothers barn. I plan to use this in a series on the topic of industrialization, specifically in china. I have had many ideas on how to make the head and body.
I've decided to make the head out of clay, though I've tried to make it out of leather and cardboard. The leather was meant to function more as a mask, and made of a semi-organic material, while the cardboard was more geometrical, to give it a 90's digital, polygonal look. |
|
Process
To make parchment paper, because I don't have any money to spend on this project, I used basic printer paper, which I aged to make look like parchment.
To do this, I used:
Even when dried, the paper will likely still feel a little oily. There are two main reasons why I used oil before soaking the paper. The main reason is because parchment is actually made of hide. Treated animal hides, unless tanned, are usually at least a little oily. Most tutorials for making tea paper/ fake parchment forget this, instead just coloring the paper. The oil also protects the paper from the coffee, keeping the paper fibers from breaking down as fast, letting it soak for longer periods of time before falling apart.
To do this, I used:
- a cookie tray
- a drying/ cooling rack
- vegetable oil
- coffee
- paper towels
- Lay one sheet of paper on one side of the tray. Put some oil on the other side, and soak some of it up with a paper towel.
- Dab and rub the oil into the paper, until the paper is semi-transparent, and sticking to the bottom of the tray.
- Wipe up any of the left over oil, and place another piece of paper on the other side. By pouring oil onto the paper towels, coat this sheet like the previous one, until it looks like the other sheet.
- If their is room for more sheets of paper, you can repeat this as many times as you can fit them on the tray. Try to avoid overlapping more than absolutely necessary.
- Pour the coffee onto the papers. Make sure the paper is completely covered.
- Let the paper sit for at least 4 hours. Realistically, the papers should sit for 6-10 hours, but by 4 hours, it should resemble raw-hide dog treats. More time in the coffee bath will result in darker paper, but long-term exposure may break the fibers of the paper apart to a point where it breaks down too easily.
- Take the paper out, setting them on more paper towels, and set them on a cookie cooling tray (or a drying rack if available).
- After about 30 minutes, use the paper towel under it to lightly dab some of the coffee off if it's pooling in the center of the pages. Put the paper towel back under it after, until the paper is fully dried.
Even when dried, the paper will likely still feel a little oily. There are two main reasons why I used oil before soaking the paper. The main reason is because parchment is actually made of hide. Treated animal hides, unless tanned, are usually at least a little oily. Most tutorials for making tea paper/ fake parchment forget this, instead just coloring the paper. The oil also protects the paper from the coffee, keeping the paper fibers from breaking down as fast, letting it soak for longer periods of time before falling apart.
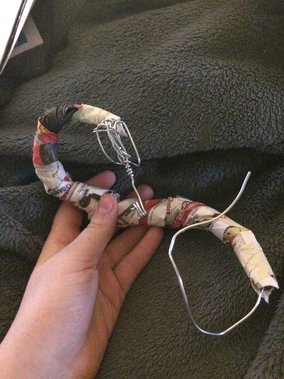
The first thing I did to make the actual form was to take some wire. I bent it into a general head shape, to support the head, and used one long piece of wire for the body. Once the wire frame was made, I packed newspaper around it, to flesh out the frame. I bent it into the position I wanted it to be in, then used wire to make the legs.
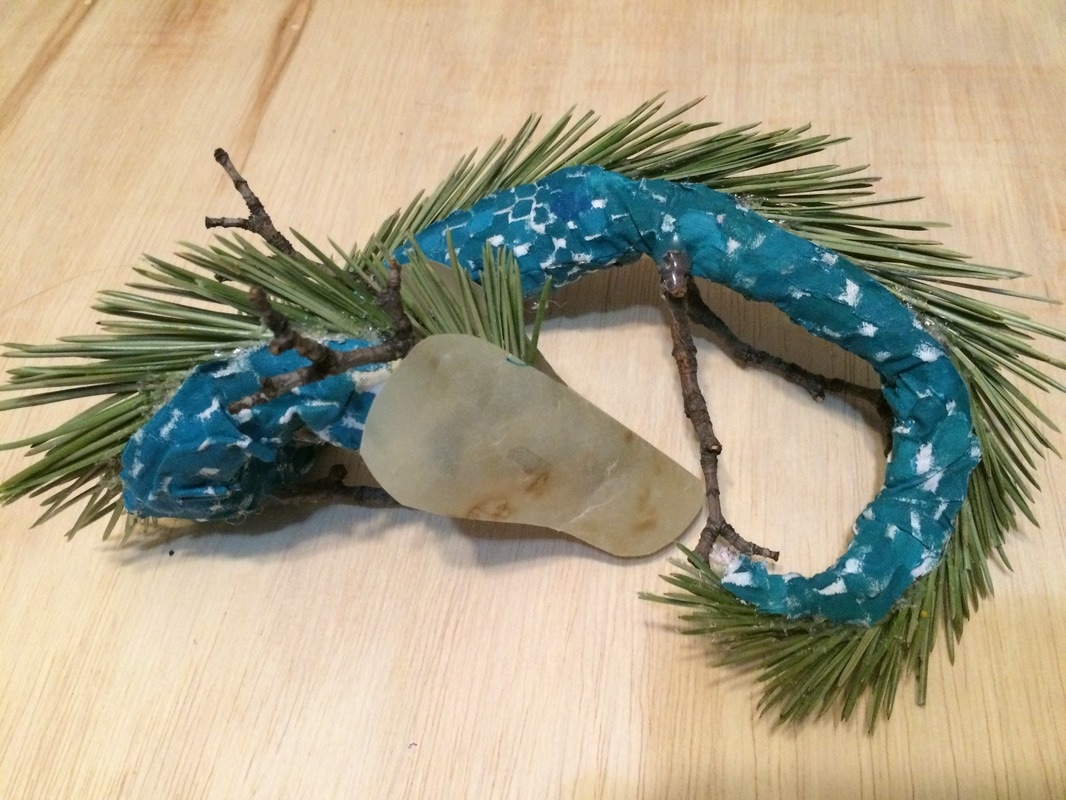
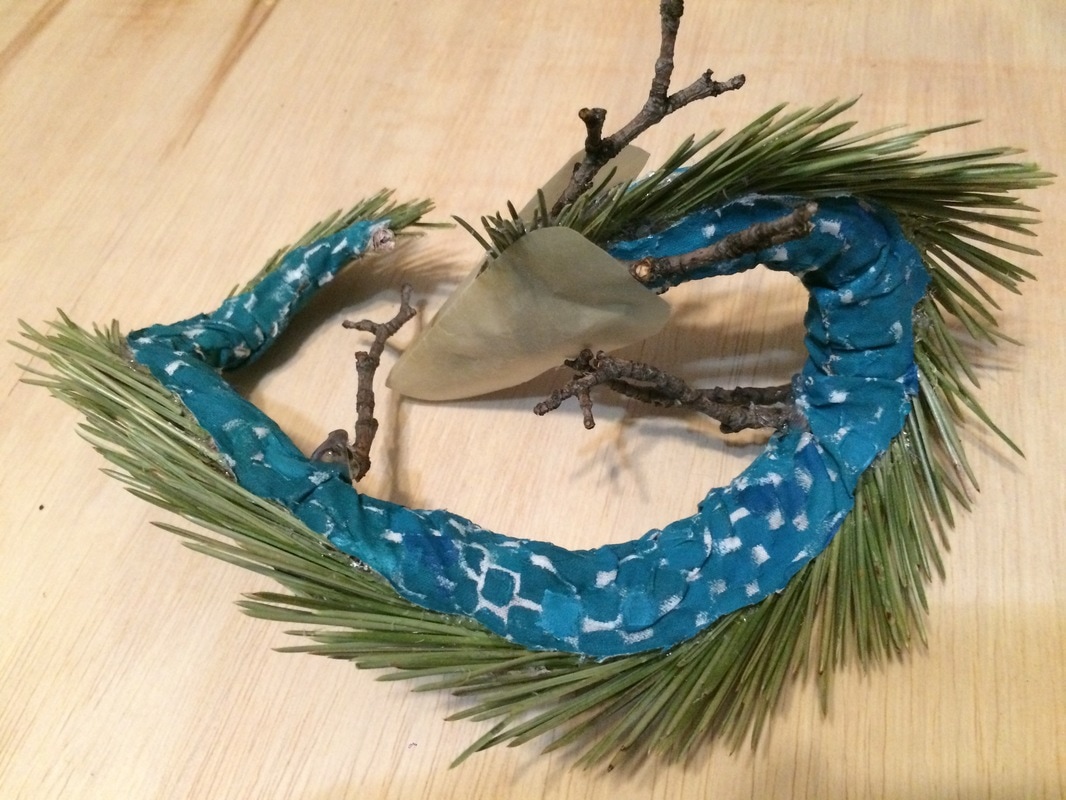
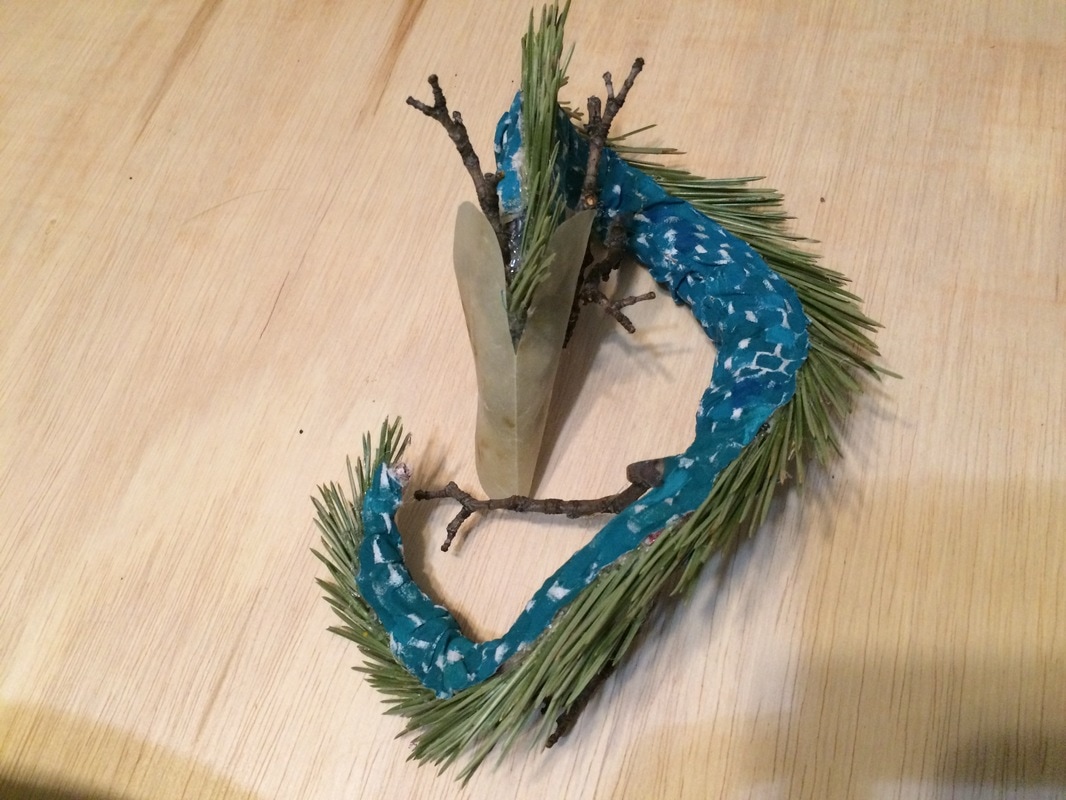
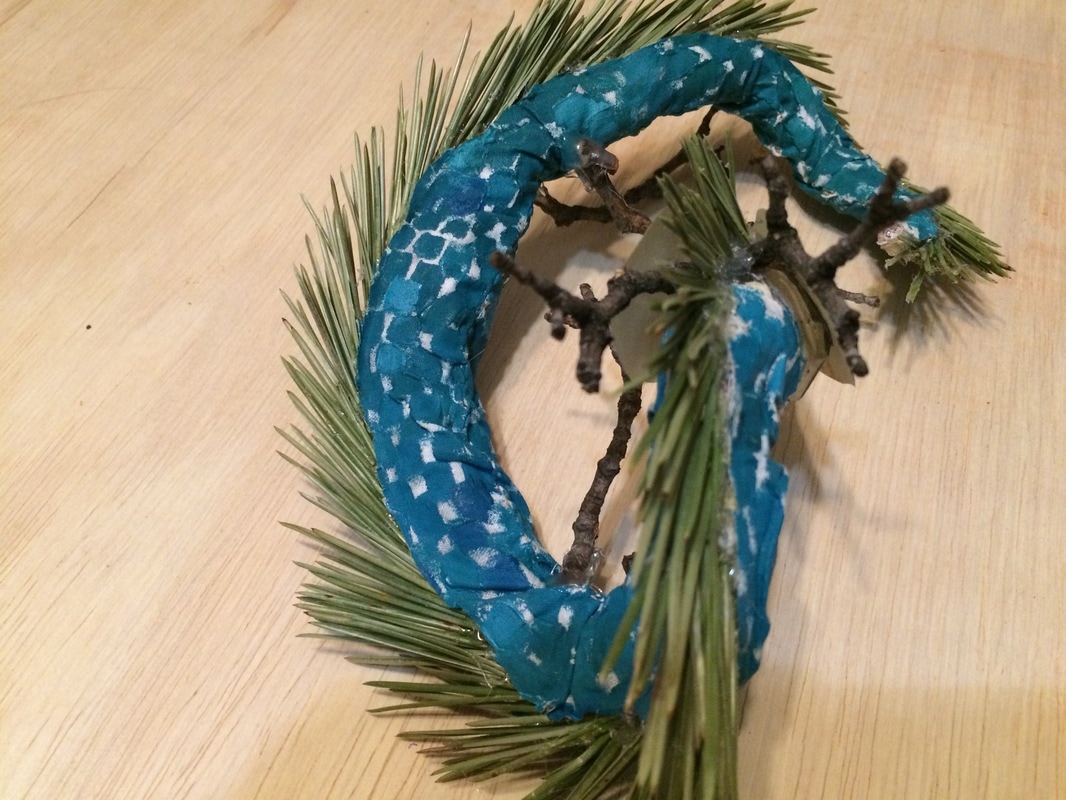
Next, I sewed the "skin". I started by cutting out 2 shapes, one a smaller wedge, the other a wedge-like shape, with both ends coming to a flat edge, rather than a point. I used a suture stitch to sew the wedge into the other form on both sides, creating a tube of cloth. Then I cut along the center of the larger piece, along the "spine". This made the fabric look like a snake skin. Using a blue-green paint, I painted scales onto the fabric.
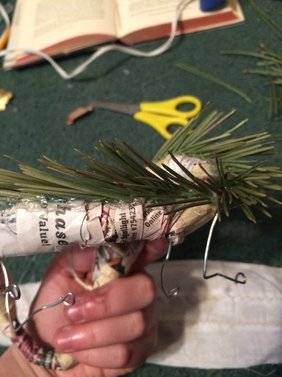
Using a hot glue gun, I glued pine needles all along the spine of the frame, to make it look like a mane of spikes or quills. I would have preferred to use something that would give a softer look, more like hair, but because of the time we started the project, the grass I would have used later in the year was brown and dead. The glue actually held the needles very well, much better than I thought they would, and none of the needles fell out once they were glued in place.
Next, I sewed the "skin". I started by cutting out 2 shapes, one a smaller wedge, the other a wedge-like shape, with both ends coming to a flat edge, rather than a point. I used a suture stitch to sew the wedge into the other form on both sides, creating a tube of cloth. Then I cut along the center of the larger piece, along the "spine". This made the fabric look like a snake skin. Using a blue-green paint, I painted scales onto the fabric.
Using a hot glue gun, I glued pine needles all along the spine of the frame, to make it look like a mane of spikes or quills. I would have preferred to use something that would give a softer look, more like hair, but because of the time we started the project, the grass I would have used later in the year was brown and dead. The glue actually held the needles very well, much better than I thought they would, and none of the needles fell out once they were glued in place.
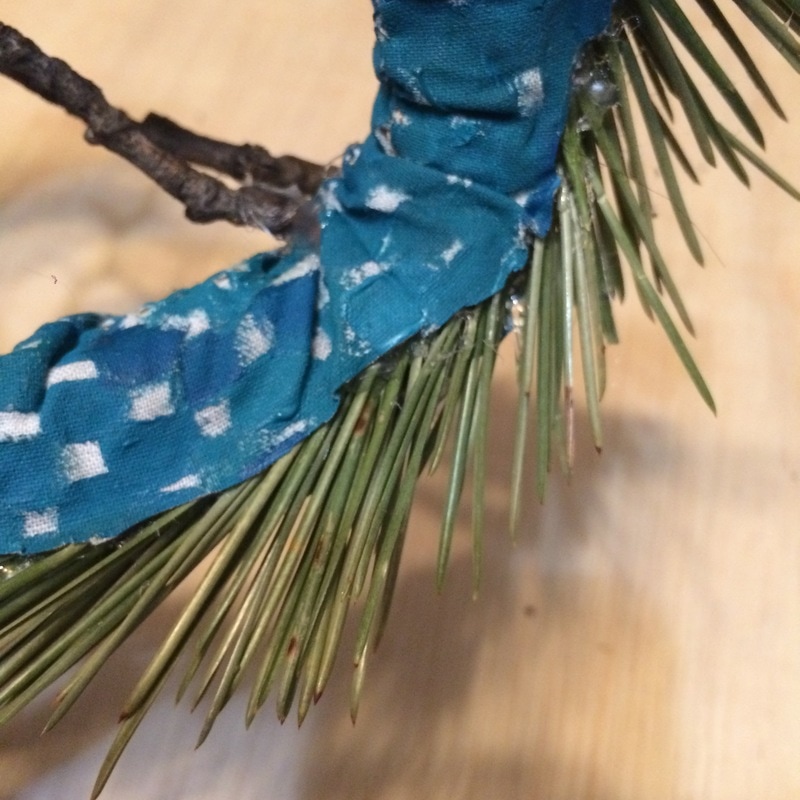
I wrapped the fabric around the frame, and pushed the wire limbs through the seams. I pulled the fabric flush against the frames underside, and used some blue thread the sew the fabric closed around the spikes. This was only a temporary way to hold the fabric in place, as it was very noticeable, and shifted a lot.
Using the hot glue gun, I glued the tail together, which was no more than the part of the fabric that was originally one piece, and only had one suture stitch down the middle. As it cooled, I would reheat parts of it, to continue the mane down past were the frame ends. This was done intentionally, to make the tail look more free-moving, and less static. I started working my way back up the dragon, gluing the skin in place. As I went, I pulled up the stitches I had put in to hold the fabric on originally.
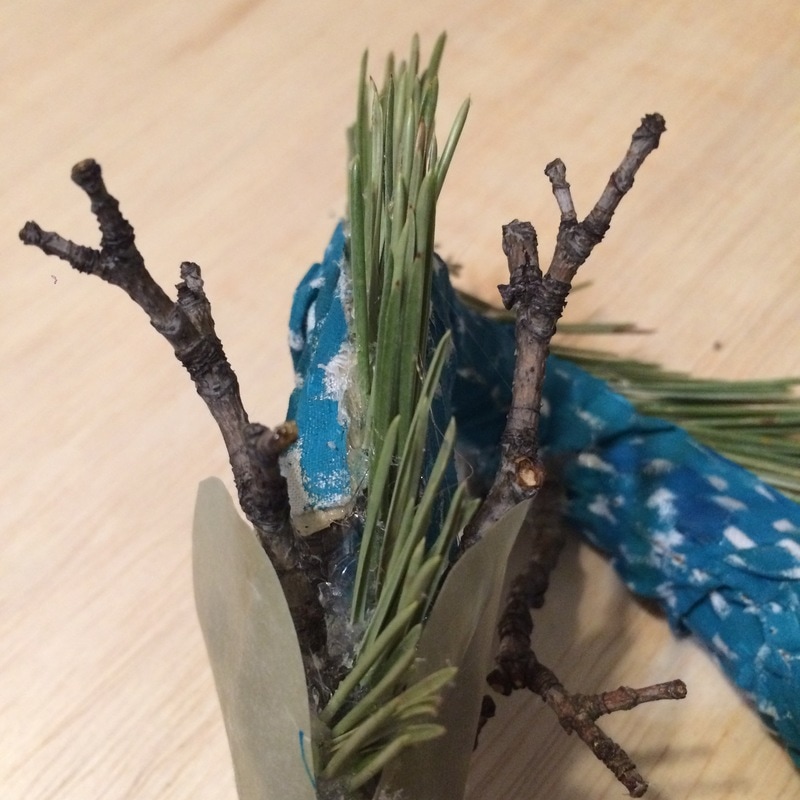
I cut the wire limbs with a wire cutter, so I had a small wire stub to glue the twigs I was using for the limbs. I pruned the twigs so they looked vaguely limb like. I found this worked okay, because the dragons were usually depicted with splayed legs.
Lastly, I made the head. I had tried to make the head in many, many ways, but I couldn't get the materials right, and even when I figured it out, I was still getting the sizing wrong. I decided to do this last, so I knew what size I would need the head to be. I used one of the pieces of paper I made to cut out the shape I needed. Before attaching this to the frame, I glued two more twigs to make the pronged horns.
Using the hot glue gun, I glued the tail together, which was no more than the part of the fabric that was originally one piece, and only had one suture stitch down the middle. As it cooled, I would reheat parts of it, to continue the mane down past were the frame ends. This was done intentionally, to make the tail look more free-moving, and less static. I started working my way back up the dragon, gluing the skin in place. As I went, I pulled up the stitches I had put in to hold the fabric on originally.
I cut the wire limbs with a wire cutter, so I had a small wire stub to glue the twigs I was using for the limbs. I pruned the twigs so they looked vaguely limb like. I found this worked okay, because the dragons were usually depicted with splayed legs.
Lastly, I made the head. I had tried to make the head in many, many ways, but I couldn't get the materials right, and even when I figured it out, I was still getting the sizing wrong. I decided to do this last, so I knew what size I would need the head to be. I used one of the pieces of paper I made to cut out the shape I needed. Before attaching this to the frame, I glued two more twigs to make the pronged horns.
|
|
Experimentation
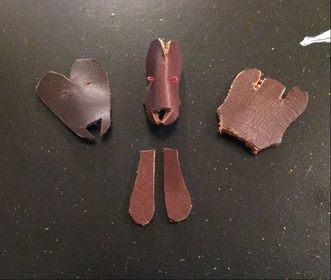
This project has been giving me some real problems. Because the head needs to be supported by relatively thin wire, the head needs to be made of a light material, but it also needs to be easy to mold into the shape I need. Originally I was going to make it out of scrap leather, but I didn't have enough big pieces. I used paper to draw a net, that would by traced onto the leather and cut out. The leather would be held in shape by a wire that also made up the eyes. The jaw would be made of 2 smaller pieces of thicker leather, also held together with wire.
To the right are some of the leather pieces I cut, the one on the right being the original design, the others the newer pattern. The middle one is held together with red wire, but the nose wasn't put together, because the leather was too thick. The two smaller bottom pieces are the jaws for the middle head.
The main reason I abandoned this idea was because I didn't have big enough leather pieces. I got a bag of scrap leather from American Science and Surplus, but because the scraps are from industrial leather companies, the only leather left over was small strips, but none were big enough for a full sized head.
I also tried to make it out of cardboard, but the shape was very boxy, because it was only a net. It was also much harder to hold the shape together, because glue didn't stick to the cardboard very well.
|
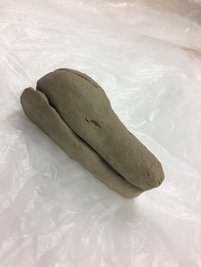
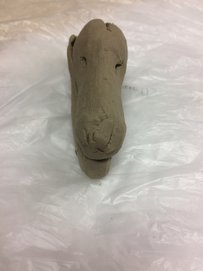
The next thing I tried was making the head out of clay, because my main problem was getting the shape and size right, and clay is much easier to work with. I would have liked to have a more simplistic shape, but with the clay, I found it hard to make a more stylized shape like I was planning, and made something that looked more like a western dragons head. I knew by the end of the class that it would be way to heavy to be supported, and would make the dragon very top heavy.
During the mid-term critique, the idea of using parchment was suggested, and I agreed that was a good idea. Because I don't have much money, I would have to make some "tea" paper, aka fake parchment. |
|
|
Wednesday Peer Review
For my peer review on Wednesday, I worked with Keric, Jimmy and Carolyn. They agreed I had a fairly strong cultural connection, but I needed to tie an artist into the project. I also need to write a more formal cultural and artist investigation, as, right now, it's not very well organized.
For my artist connection, I need to include images of some of their works, and I need to explain how it connects to what I'm doing. I plan on including some traditional paintings and sculptures of Chinese dragons from china, because the shape and form is being directly referenced in my work, but because many of these pieces of art are artifacts, they don't have a direct artist I can talk about. I also plan to include an artist known for working with natural materials, especially grasses, reeds, or leaves, because I plan on using natural materials that can still last awhile. I plan on using the 2 mixed media pieces for this semester in a series, because the plan I originally wanted would take to long for only one project, and also fits into the requirements for both of the projects.
My main topic of this series is how industrialism (specifically in china and other Asian countries) has increased, leading to damage to more natural resources being damaged, and a drop in agricultural communities. This topic is in no way original to China, but it is a much more recent issue in Asian countries. This also happened in America, but it happened in the late 1800s to the early 1900s. In China, the change from an agrarian to an urban society happened in the 1950's, when it was changed to the People's Republic of China, and with it's change to a socialistic governing style.
The last thing I have to do is post images of my failed attempts to my webpage. I have a few pictures of the head I've decided to work with, but I need to take pictures of the failed attempts and post them online while i'm at home, because I don't bring a charging cord for my phone to school.
(word count: 375)
Reflection |
ACT Questions |
