|
Virtual [Real]ity
|
Reserch
|
My piece is based of low-poly 3D models. This can be both a glitch, or a limitation of the hardware, or an artistic choice to use simple shapes and patterns.
Low poly models can be seen in old video games and CGI movies. These are do to limitations to hardware. An example of this includes games on the N64, PlayStation 1 and 2, and the Xbox. The hardware of these simpler machines couldn't process larger files, meaning less points could be used to plot out the models. This resulted in "low-poly" models, as the number of polygons per model were small, meaning the polygons could easily be made out. These older games also couldn't render hi-resolution textures, but the companies usually tried to use the most complex textures they could. This often resulted in pixel-y characters and backgrounds. |
|
In both older and newer 3D games, glitches involving misplaced points are a constant issue. This can result in a common glitch, in which some points are misplaced while a model "regdolls" usually after death. This results in "character stretch" where limbs are stretched out in strange ways. This can be seen in some of the first 3D poly games, and is still seen in new games on current consoles.
Most modern games use a very large number of polygons to render a character, but some games use less to create a retro look. These modern, low poly models take advantage of the greater capabilities of new hardware, allowing a greater variety of colors, but choose to use low-poly models and simple patterns. Some examples of games that choose to use low-poly models include popular games like Crossy Road and Minecraft.
Much like all other other art styles, this low-poly style transcends to other areas of art. Low-poly artwork isn't only for video games anymore. Simple 3D models of characters and backgrounds are sometimes used to create 2D images. 3D models are made in programs, then positioned and captured as a 2D image. This can be used for prints or advertising, as they're already in a digital form.
Planning
|
In an attempt to diversify my portfolio, I wanted to get some experience working with different types of digital art programs. In my choice piece, I used a 2D drawing program called Medibang, so I wanted to try a 3D program. I had some basic experience with SketchUp, an architectural program owned by google. The program has some basic tools, but not many of them, and is rather limited.
Another free program for 3D modeling I found was Blender, but I had no experience in the program, and it was much more complicated than SketchUp. I didn't have time to learn how to use such a complicated program in the short amount of time, so I decided to use SketchUp to make the figure. As far as organic forms I could make, I wanted to do either a face or a hand, do to how well they look in low-poly art. A hand would look cool, but the program I was using was intended primarily for architecture, and creating figures that don't have flat "floors" along the x and y axes gets very complicated, with a lot of guidelines in all directions. With a face, the back of the figure that no one would really see could be a flat shape, and to make the lines that don't follow any of the main axes by making right triangles. |
Process

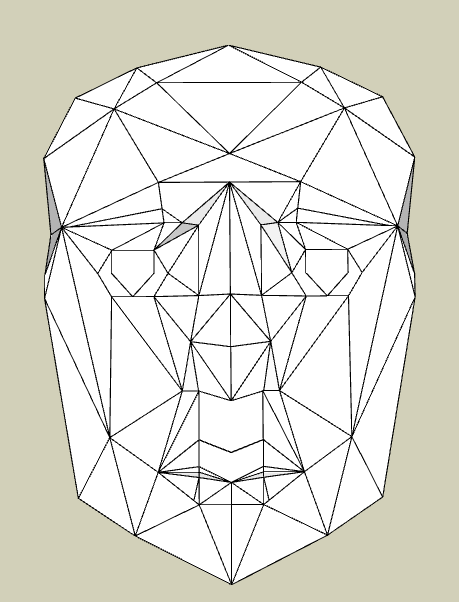
In a new SketchUp document, i deleted the little 2D figure of a man, which sits near point 0,0,0. It's meant to act as a scale in a finished model, but it tends to get in the way if you're starting from scratch. From there I used the measurement tool, which doubles as a guide line tool. I created a 4 x 5m rectangle on the horizontal plane using these guides, then marked out 4 points .5m from the top corners, and 8 points that were .5m and 1m from the bottom corners. I then connected some of these points to create small parabolic curves. Then, using the line tool, I outlined the shape of the head. After this, I deleted most of the guides, and fixed up the top of the head, then made the facial features of the man. This gave me a 2D outline of the main shapes that would make up the final form.
|
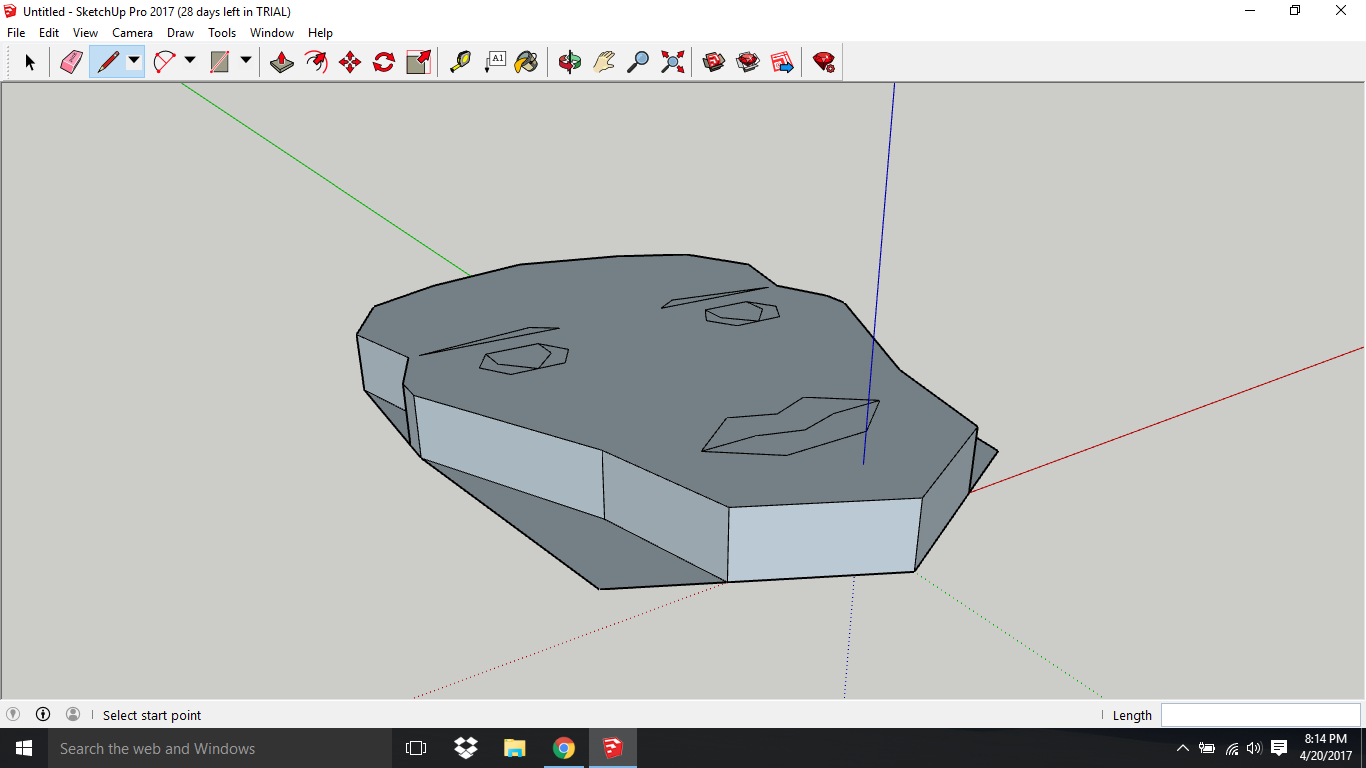
With the shape drawn up, I could now start influencing the z-axis. Using the pull tool, I selected the face, and raised it .5m. I repeated this with the eyes, eyebrows and mouth. The nose wasn't a closed shape, so I had to use the move tool to select the lines and manually raise it .5m vertically. This can be a bit tricky, as this interface isn't great about assuring you're moving something along the right axis, especially if your trying to move it in a way that isn't parallel to an axis. While drawing lines that aren't parallel to an axis or attached to a previously existing line, the points can easily be placed on the wrong location too.
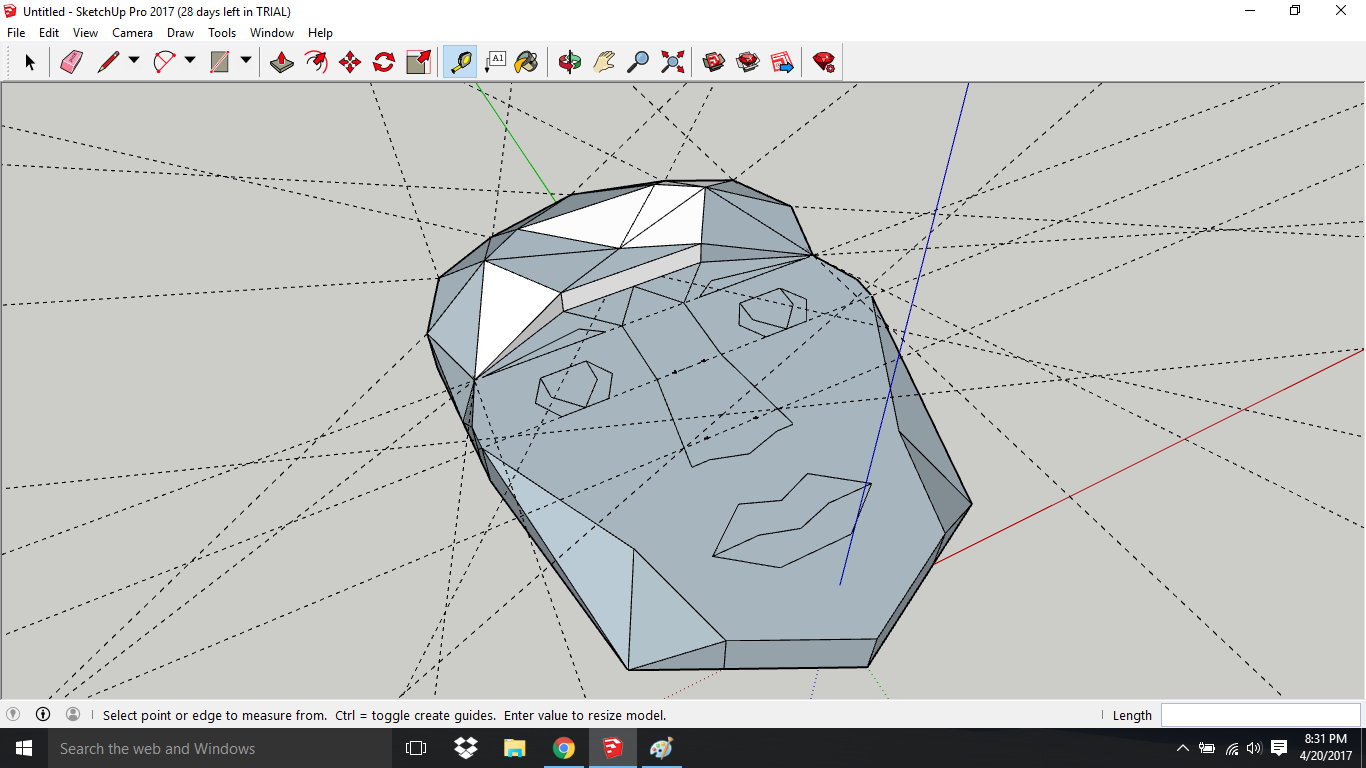
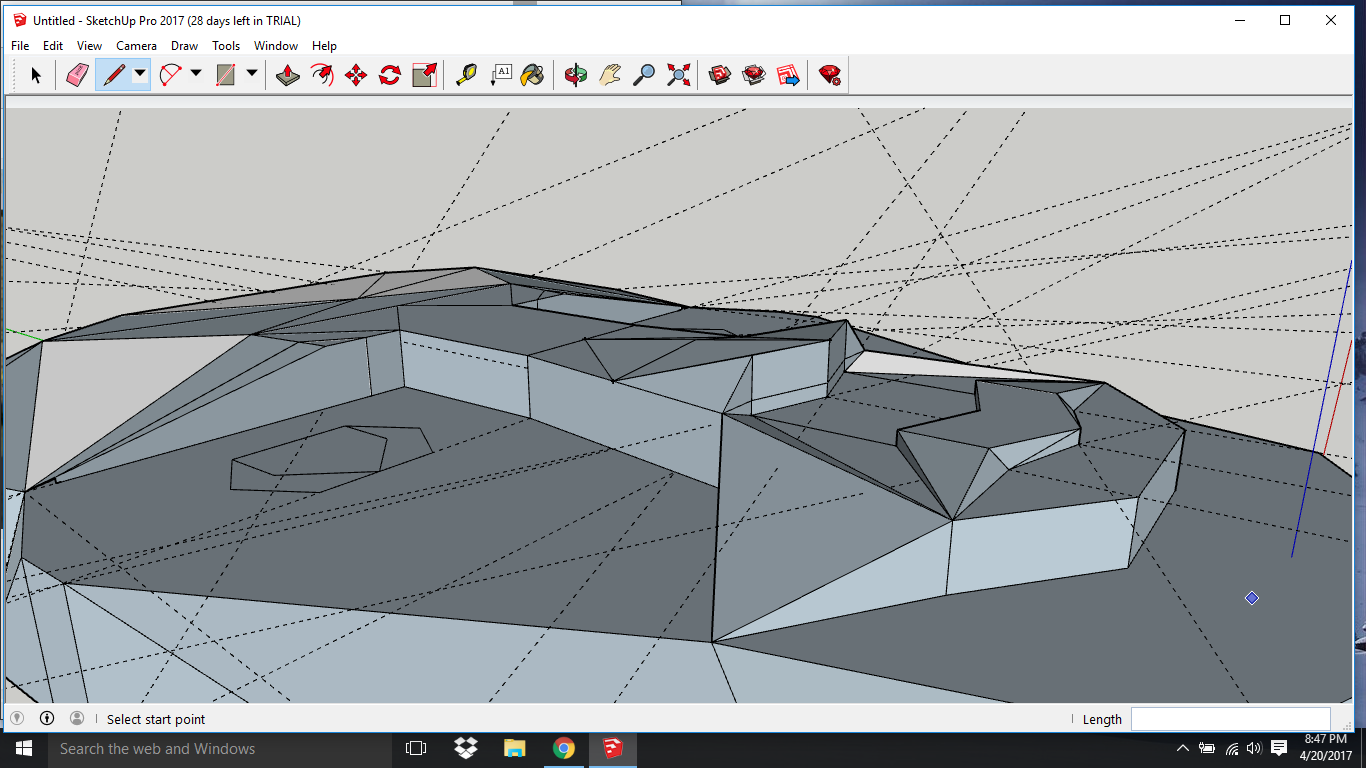
The shapes used to create the illusion of a rounded slope was measured out using the guide tool, so I could see how it would effect the layout of the face before taking the time to create the 3D shapes. Starting with the jawline, I connected the corners with the line tool to create sloping edges. Most shapes needed to be triangles, as any 3 points are on the same plane. With quadrilaterals, 3 points could be on the same plane, but the third one might not sit on the same plane, which would need to have a curved surface. This is possable in SketchUp, but not in polygonal models, where all curves are parabolic. To create the lines that don't travel parallel to any axis, I needed to make a right triangle. for the most part, the horizontal leg was already provided, I only needed to create the vertical leg. From one of the corners, I would use the line tool to draw a line parallel to the z-axis to the length I wanted the section to be raised up to. Then I would connect the end-point of this line to the other corners to create a polygon.I would repeat this process multiple times to get the shapes to the right height. After finishing an area, I would delete the guidelines, before making more in a new section. I would always base these lines off measurements, rather than just laying a line down where one looked like it needed to be, so I could measure it out again on the other side of the face, so it would stay symmetrical. |
|

To present this piece, I wanted the background to be a reletively solid color, and I wanted all of the shapes to be about the same color. To do this, I used the paint bucket tool to open the colors sub-menu. This menu allows you to paint faces of the model with some basic colors provided with the program. Another tab in the sub-menu allowed you to change the color scheme of the background and figure. I found one that was beige and white, which kept a nice, consistent color scheme, and also changed most of the shaded areas to white when viewed from directly above.
Because this program only lets you save your work as a SketchUp file, I needed to use a screen shot of it to get a 2D image of the finished piece.
Because this program only lets you save your work as a SketchUp file, I needed to use a screen shot of it to get a 2D image of the finished piece.
Reflection
SketchUp is only a trial program, and doesn't have all of the pro options without paying about $700. Within these limitations, I think i did pretty good, but I feel like if I had had the time to learn how to use Blender, I would have been able to do a much more advanced project, and probably a better concept.
Blender allows for much easier manipulation of shapes without needing to create right triangles to make lines that don't run parallel to an axis. It also allows for custom colors and patterns, and has a built in camera and animation function, and saves in .blend, which is supported my sketchfab, which can present 3D models online. SketchUp doesn't save in a supported file, so I couldn't upload it to be viewed in it's 3D form.
I personally like the blank white color on the model, but putting it in a more realistic skin-tone could have added itself to the piece as well. The goal of this piece is to represent the growing interest in VR and AI programs. I think both of these color options would have done this well.
I think I chose the best way to display this project, but I think it would have been cool if I could upload the 3D file to a sight they could view it, but unless they download the file and play around with it on their own.
This is definitely something I'd be willing to do again some time, and I'l definitely be teaching myself how to use Blender over summer.
